Control Pannel User Guide
Control Pannel is the lightweight desktop application for everyday operation. Use it when you want to switch USB ports or view device status without writing code.
Tip
Complete the wiring steps in your product manual, then download Control Pannel. The application scans for SmartUSBHub devices automatically; open the Control page to operate each downstream port.
Audience: everyday users of SmartUSBHub devices.
Software: Control Pannel 1.2 and later compatible versions.
Document version: 20260724.
1. What this software does
Control Pannel is the desktop control software for SmartUSBHub. It connects to a SmartUSBHub device and lets you control downstream USB ports, view status, configure device modes, update firmware, and check for software updates.
You can use it for these common tasks:
Turn each USB port on or off.
Rename channels so you can remember which device is connected to each port.
View per-channel voltage and current on models that support monitoring.
Configure interlock mode, physical button control, power-loss restore, and default-on behavior.
View the device firmware version, hardware version, and device address.
Check online for Control Pannel software updates and device firmware updates.
2. Installation and startup
macOS
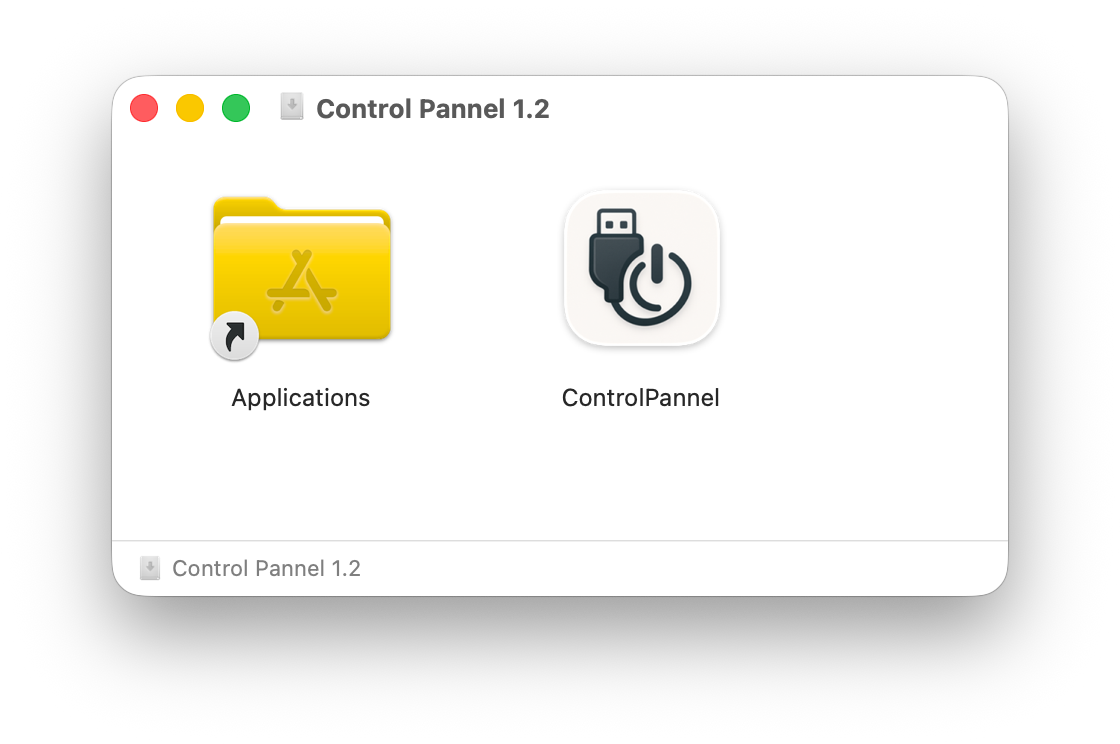
Figure 1: macOS installation window. Drag Control Pannel into the Applications folder.
Double-click the
.dmginstaller.Drag
ControlPannel.appinto theApplicationsfolder.Open Control Pannel from Applications.
If macOS says the developer cannot be verified, allow the app in System Settings > Privacy & Security, or Control-click the app in Finder and choose Open.
Windows
No installation is required. Double-click ControlPannel.exe to run it. If Windows shows a security confirmation, allow the app to run.
Before you start
Connect both the SmartUSBHub
CMDport andDATAport to the computer with USB data cables.Wait for the operating system to recognize the device.
Open Control Pannel.
SmartUSBHub uses USB CDC serial communication. Windows 10/11, macOS, and common Linux distributions require no dedicated driver. On Windows 7, install the SmartUSBHub Windows 7 CDC Driver before connecting.
Important
Both the device CMD port and DATA port must be connected to the USB host.
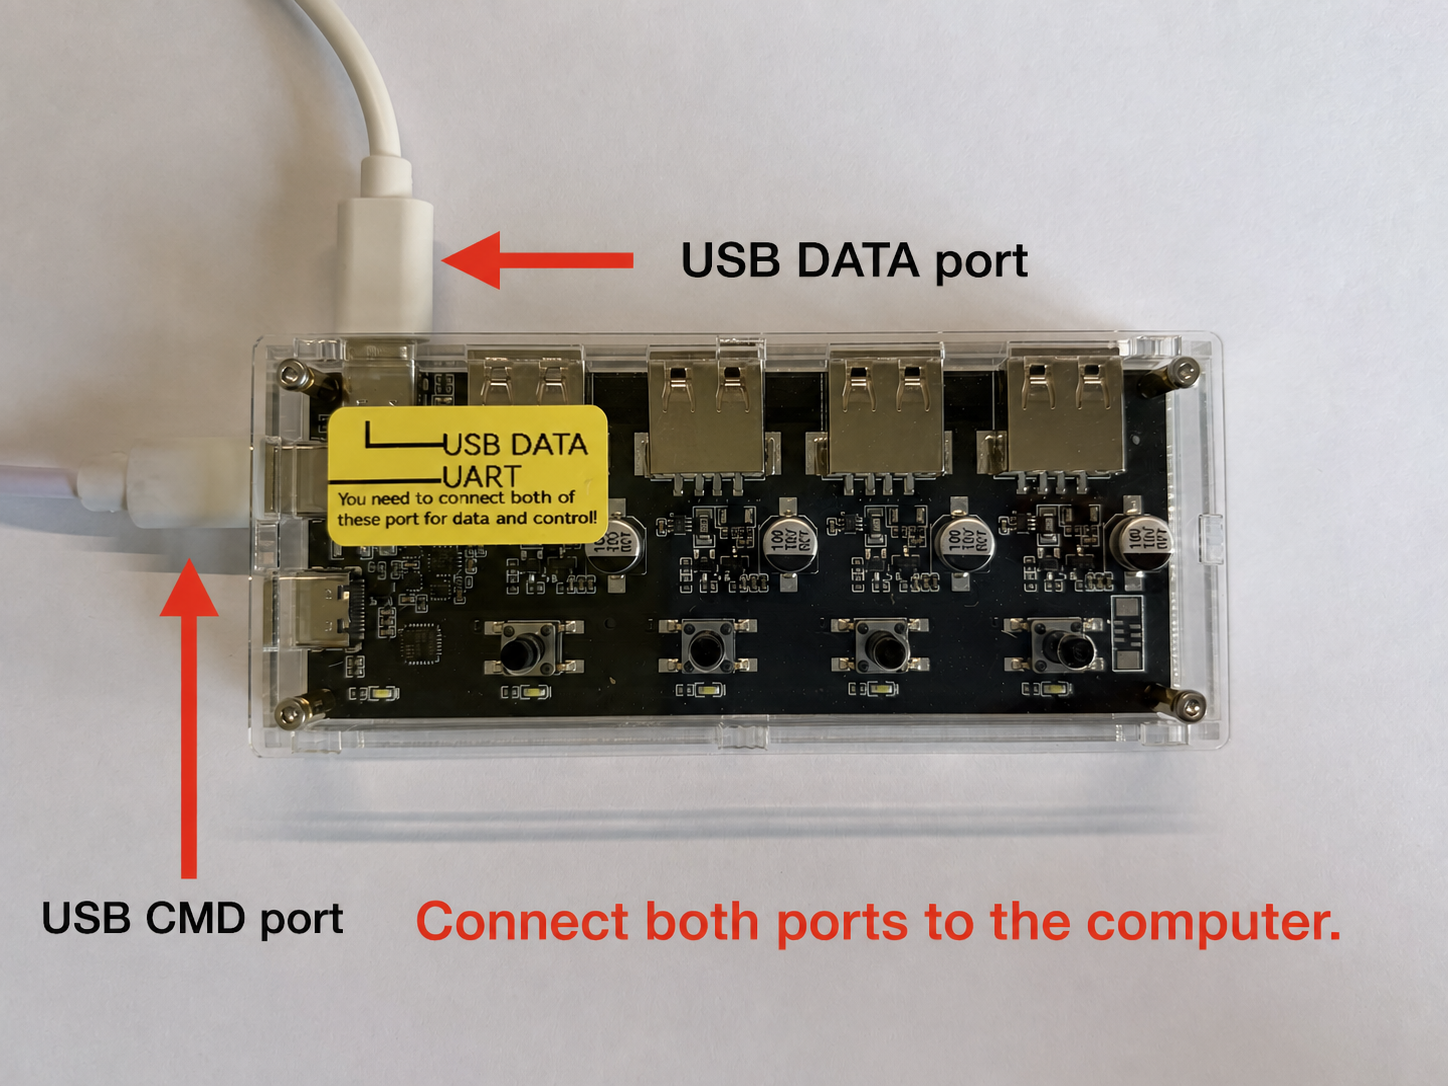
Figure 2: Connect both the USB DATA and USB CMD ports to the computer.
3. Interface overview
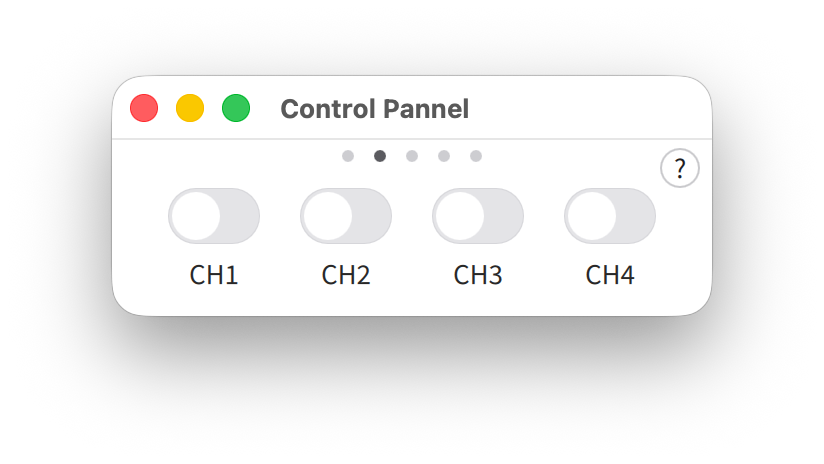
Figure 3: Control page overview. The dots at the top switch between pages.
The dots at the top of the software window switch between pages. You can also swipe horizontally with a trackpad or mouse.
Common pages:
Connection/Settings page: select a device, connect or disconnect, and configure operating modes.
Control page: turn each channel on or off.
Monitor page: view voltage and current. This page appears only on models that support monitoring.
Info page: view device version, address, and current mode.
About page: view the software version, user agreement, and check for updates.
The software opens on the Control page by default.
4. Connect a device

Figure 4: Connection/Settings page. Select a device, connect or disconnect, and configure modes.
Note
The software automatically connects to the device. If the device is connected before the software opens, manual connection is usually not required.
Switch to the Connection/Settings page.
Select the SmartUSBHub device from the device drop-down list.
Click Connect.
After connection succeeds, the Control page shows the channel switches. If no device is available, check whether the USB cable supports data, whether the device is powered, and whether another program is using the same device.
Multiple devices
If multiple SmartUSBHub devices are connected at the same time, the software labels them as Device 1, Device 2, and so on. The Control page displays multiple devices side by side. On the Connection/Settings page and Info page, click the device tab to view or change settings for that device.
5. Control USB ports
Figure 5: Control page. Each switch controls one downstream USB port.
On the Control page, each switch corresponds to one downstream USB port.
Switch on: the port is powered and the downstream USB device is connected.
Switch off: VBUS is removed and the data lines are disconnected, so the downstream device powers down and disconnects from the computer.
When a single device is connected, you can click a channel name to edit it, for example Phone, USB Drive, or Debug Board. Press Enter or click elsewhere in the window to save. The name is stored inside the SmartUSBHub device and remains available when the device is connected to another computer.
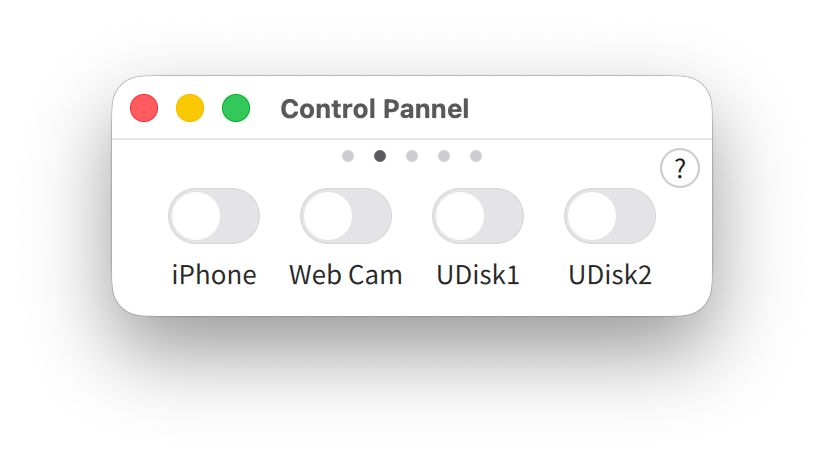
Figure 6: Channel names are editable and are saved to the device.
6. Operating mode settings
The Connection/Settings page provides four commonly used options.
Figure 7: Operating mode settings, including interlock, button control, power-loss restore, and default-on.
Interlock
When enabled, only one port can be on at a time. This is useful when switching between multiple USB devices and you do not want them to be connected to the computer at the same time.
Power-loss restore
When enabled, the device saves the current port states. After power is removed and restored, the device restores the previous port on/off states.
Default on
When enabled, all ports turn on by default when the device powers up. This is useful when you want the device to behave like a regular USB hub immediately after power-on.
7. View voltage and current
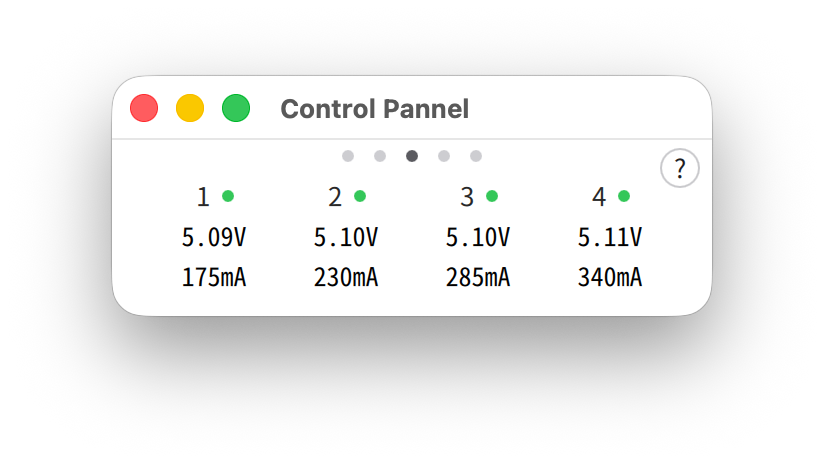
Figure 8: Monitor page showing voltage and current on models that support monitoring.
Models with voltage/current measurement, including SmartUSBHub Pro 4CH USB2.0 and HBP_USB2_7CH_ADV, show the Monitor page. The standard HBP_USB2_7CH does not provide voltage/current measurement. The page displays the following for each channel:
Voltage, in V.
Current, in mA.
A status dot next to the channel. Green means the data is normal.
Models that do not support monitoring do not show the Monitor page.
8. View device information
The Info page shows basic information about the current device:
Firmware version.
Hardware version.
Device address.
Operating mode.
Power-loss restore status.
Button control status.
The device address usually does not need to be changed. Only change it when instructed by technical support, when planning multi-device addresses, or for a specific automation workflow.
9. Check for updates
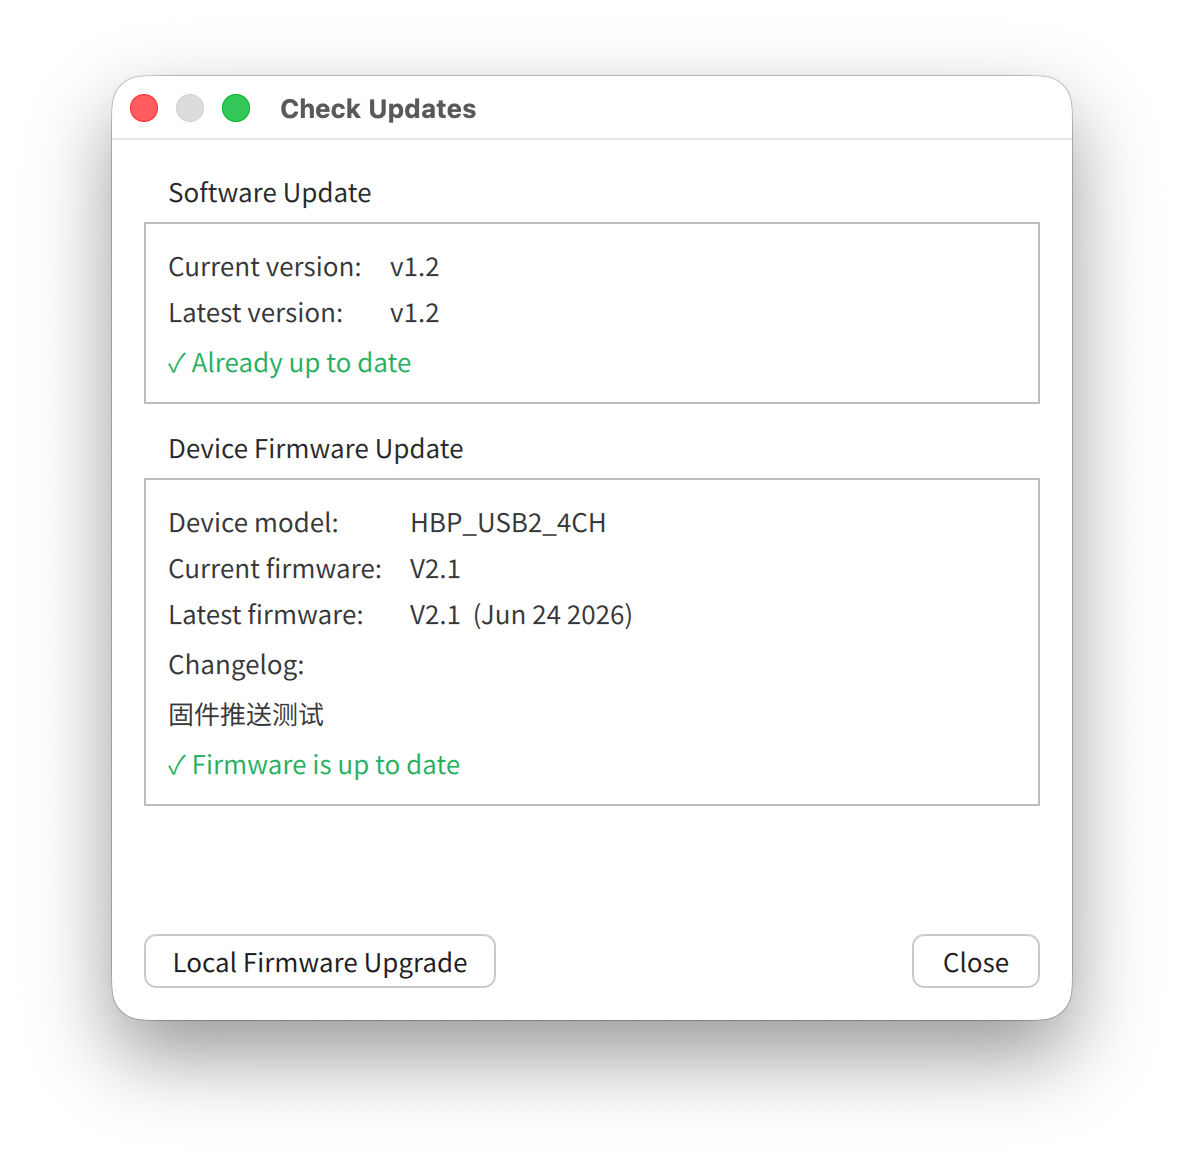
Figure 9: Check for updates window. It can check both software and device firmware versions.
Switch to the software page and click Check for Updates. The software checks two types of updates:
Control Pannel software updates.
Firmware updates for the currently connected device.
If a new software version is available, click Download and Install. The installer is downloaded to the system Downloads folder and opened by the operating system.
If new firmware is available, click Download and Upgrade. After the firmware upgrade completes, the device restarts automatically and the software attempts to reconnect and refresh the displayed version.
10. Local firmware upgrade
In the Check for Updates window, some devices show a Local Firmware Upgrade button. This feature lets you select a local .fw firmware file for upgrade.
Everyday users should prefer online firmware updates. Use local firmware upgrade only when:
Official technical support provides a specific
.fwfile.The computer is on an internal or offline network and cannot access the online update server.
You need to restore or test a specific version.
After you select a firmware file, the software shows the firmware model, software version, hardware version, build time, and checks whether it matches the current device model. If the model does not match, the software blocks the upgrade.
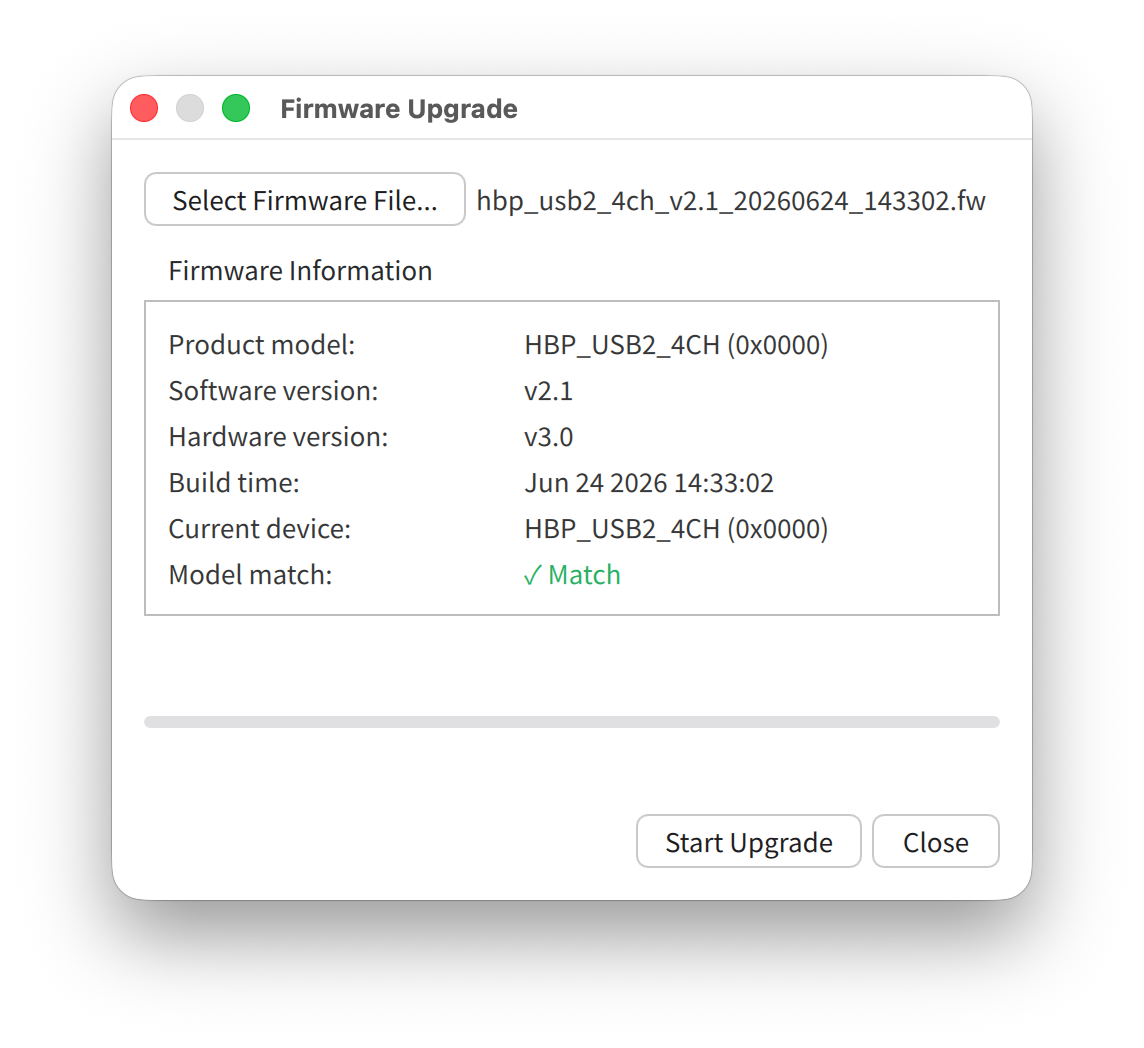
Figure 10: Local firmware upgrade window. The software checks whether the firmware model matches first.
Caution
Do not disconnect the device or close the software during firmware upgrade.
11. FAQ
Device not found
Check the following:
Whether the device
CMDport is connected to the USB host.Whether the USB cable supports data transfer.
Whether the device is powered correctly.
Whether the operating system has recognized the USB serial device.
Whether another serial tool, automation script, or older software is using the device.
Unplug and reconnect the device, wait a few seconds, then reopen the software or click Connect.
Important
Both the device CMD port and DATA port must be connected to the USB host.
Connected USB device not found
Check whether the device
DATAport is connected to the USB host.
Important
Both the device CMD port and DATA port must be connected to the USB host.
Update check failed
Confirm that the computer can access the internet, then try again later. Core control functions do not depend on the internet. You can still connect to and control the device without checking for updates.
macOS cannot open the installer or app
Confirm that the installer came from an official channel. If macOS shows a security restriction, allow the app in System Settings > Privacy & Security.
12. Safety notes
Do not disconnect USB, close the software, or let the computer sleep during firmware upgrade.
Before controlling important devices, confirm the channel number and channel name.
Before using interlock, power-loss restore, or default-on mode, confirm that the mode matches your test or production workflow.
If the device is used in automation testing or on a production line, verify the workflow first in a no-load or low-risk environment.
13. Support
Website: MixedSignalLab
Downloads: SmartUSBHub software downloads
Documentation: SmartUSBHub documentation
Sales: sales@mixedsignallab.com
Technical support: support@mixedsignallab.com
Store for customers in China: MixedSignalLab on Taobao
When contacting technical support, please provide:
Control Pannel software version.
Device model.
Device serial number.
Firmware version.
Operating system version.
The exact steps that led to the issue.